How to Integrate LeadsBridge and Sendlane
LeadsBridge is a Facebook advertising automation platform that allows you to connect and sync your advertising and sales funnels in real-time, bridging the gap between Sendlane and Facebook Ads Manager.
Before Getting Started
Prior to connecting with Sendlane, you'll need an active LeadsBridge account.
You also need to have a Facebook ad account connected to Facebook Business Manager.
Additionally, please make sure to create a pop-up inside of your Sendlane account.
Integrating LeadsBridge and Sendlane
- Login to LeadsBridge and navigate to Integrations

- Next, click on the Add New button

- Name your integration and then click on Browse to search for Sendlane

- Add your HTML Form code (please make sure to use the RAW code from your Sendlane pop-up and it should be similar to the one below)

- Click on Finish and you're done!


Next Steps
Moving forward, if you are looking into integrating Facebook Lead Ads to Sendlane, through LeadsBridge so data can pass in both directions, please follow the steps below:
- Navigate to Bridges

-
Next, click on the Add New button

-
Name your Bridge, browse for Facebook Lead Ads in the Select Source field and for Sendlane in the Select Destination one and the destination we created in the above steps will come up by default (you can always create a new one if need be)

-
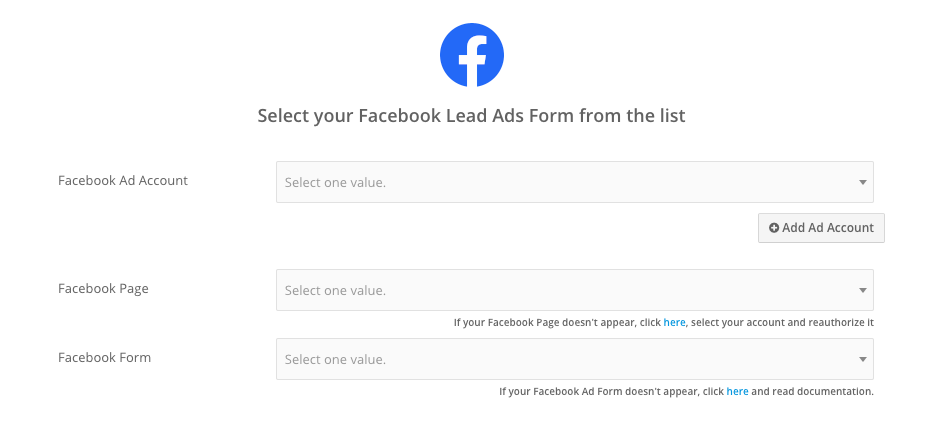
Next, you will need to choose your Facebook Ad Account, your Facebook Page and Facebook Form (if you haven't yet added your Facebook account to your LeadsBridge dashboard, you can do so by clicking on the Add Ad Account button)
- On the next step, you will need to simply confirm that you want the leads to be added to Sendlane, through the custom form. You'll also have the possibility to choose if you want to be notified via email as soon as someone subscribes, by toggling the button to Yes. When you are done, click Next

-
Here, you will need to match the fields you added inside your Facebook form and send this info over to Sendlane, like: Name, Email, Form Title, etc.

- In this final step, you'll be able to send a lead from LeadsBridge to test if the configuration works properly. To do so, simply fill in your Email and Full Name and then click on Test Now.

- If you did everything right, the button will turn green, meaning your lead was synced successfully and the integration is ready, so please make sure to click on Save & Publish at the bottom


To check if it worked, you can also view the list you selected inside your Sendlane account and you should see the test information you added. If it's there, it means your integration is successful and ready to be used! Congrats, you’re done!
Please Note
For the integration test to be successful, you'll need to make sure that your Sendlane account is set up with single-opt in access (contact our 24/7 support team to set this up!)
Troubleshooting
This integration is native to LeadsBridge, so we're only able to provide limited troubleshooting support. However, if you do need help, the LeadsBridge team is just a few clicks away!
- Connect with their Support Team
- Visit the LeadsBridge Help Center
Additional LeadsBridge Resources
Additional Sendlane Resources
- 4 Design Elements of Converting Landing Pages
- 8 Ways Successful Marketers Align Their Social Media and Email Marketing for Maximum Success
- Social Media vs Email Marketing: 5 Reasons Why Email Marketing Wins
TL;DR
Login to LeadsBridge → Integrations → Add New → Name your integration and browse for Sendlane → Enter the RAW Form code (from within Sendlane) → Finish
Go to Bridges → Add New → Name your bridge and browse for Facebook Lead Ads and Sendlane → Choose your Facebook Ad Account, your Facebook Page and Facebook Form → Enter a test email address and Test Now → Save & Publish