How to use custom events to trigger automations
Last updated: February 28, 2025
Overview
Sendlane’s API allows you to create custom events that can be used to trigger automations. In this guide, you'll learn how to set up your own custom triggered automations using a password reset workflow as an example.
Before getting started
Set up a Sendlane Custom Integration
Review Sendlane's custom event API documentation
Step One: Create a custom event in Sendlane
Navigate to your completed Sendlane Custom Integration
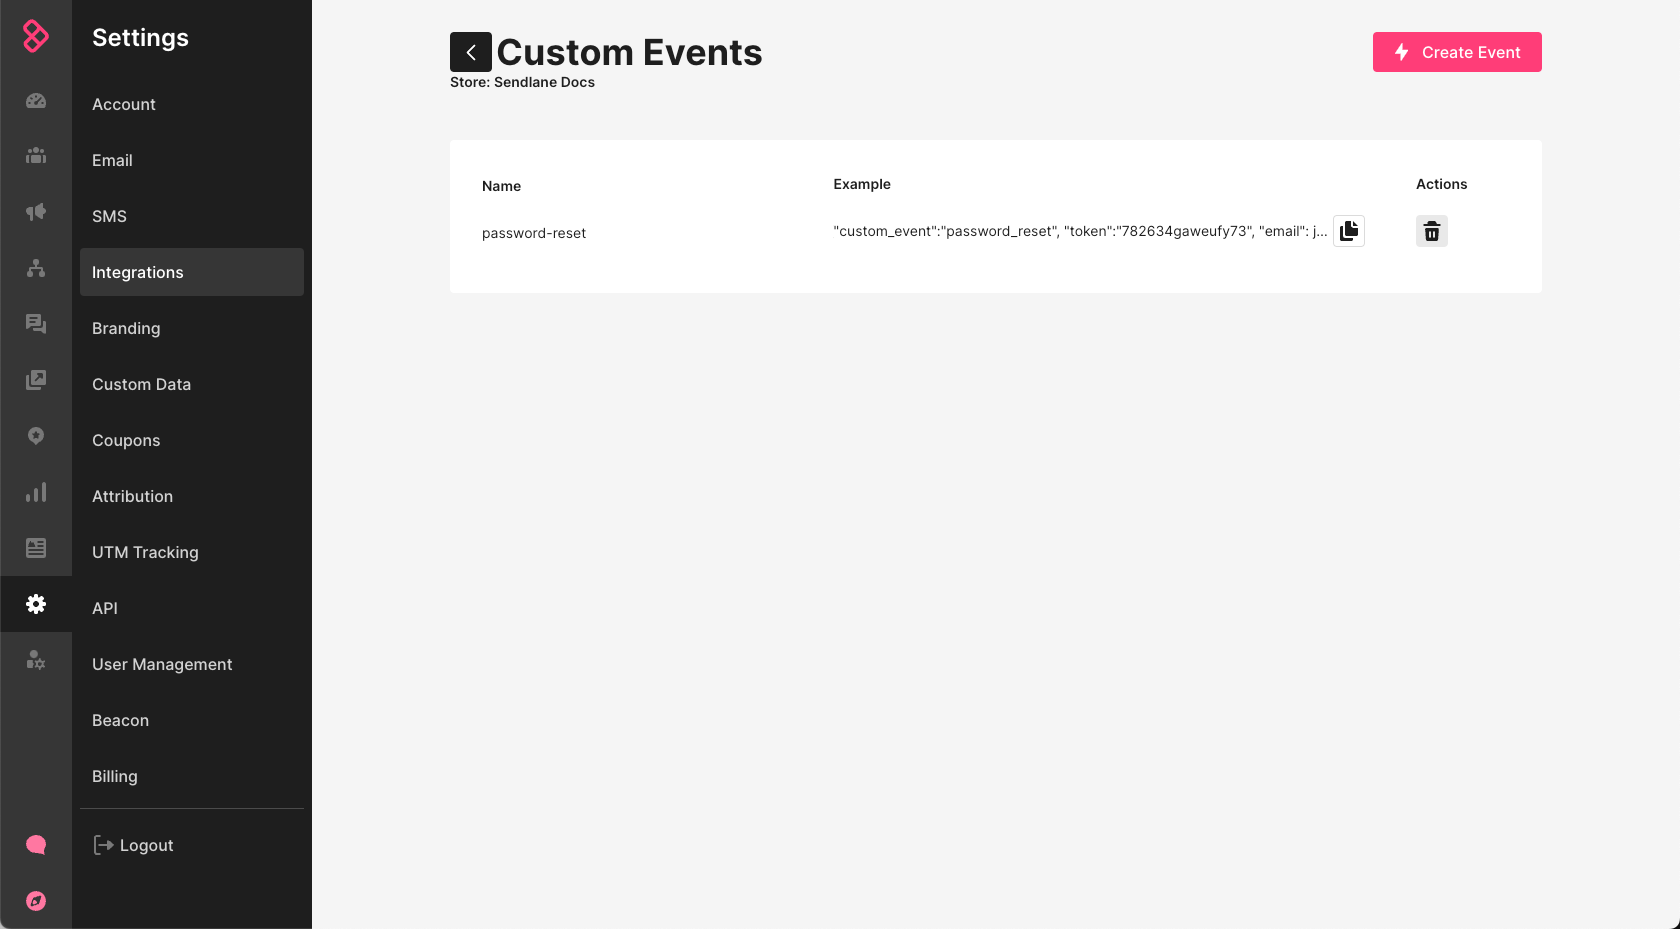
Click the Events icon
On the Events page, click Create Event > Enter a descriptive name > Create
We’ll name our example event password-reset.
Step Two: Create an API call
Use a JSON snippet like the following to build a password reset request API call:
{
   "custom_event": "CUSTOM_EVENT_NAME",
   "token": "CUSTOM_EVENT_TOKEN",
   "email": "jimmykim@sendlane.com",
   "data": {
     "password_reset_url": "https://www.yourwebsite.com/reset/1234567890"
   }
}custom_event- Your custom event’s name (our example event’s name ispassword-reset)
token- Grab the token associated with your custom event by heading to the Sendlane Custom Integration page > Click Settings > Click Copy > Paste in place ofCUSTOM_EVENT_TOKEN
Test your call to confirm your setup. You're good to go if your call is successful and you see example data on the custom events page If your event does not show data in the example column like the example below, review your custom event and API call setup:
Step Three: Create an automation triggered by the custom event you created
Create an automation and select the custom event trigger from the custom integration tab.
Configure your trigger
Store - Select your store
Event - Select the password-reset event
Limit Per Contact - Select a limit for how and when Contacts are sent through the automation. For our password reset example, we selected No Limit so Contacts can reset their password as many times as needed.
No Limit - The Contact will be sent through the automation whenever the trigger conditions are met
Do not trigger when already in automation - If the trigger conditions are met but the Contact is already being sent through the automation, the Contact will not trigger the automation again
Once Per Day - If the trigger conditions are met but the Contact has already triggered the automation on the same day, the Contact will not trigger the automation again
One Time Only - Contacts will only trigger the automation one time
Add a wait node
Add a wait node of as the first step of the automation. For our password reset example, we’ll use 1 minute. Wait nodes default to a 1 hour wait.
Add an email node
Create an email node and use Twig templating syntax to pull in data from the payload. Sendlane supports a subset of the Twig language.
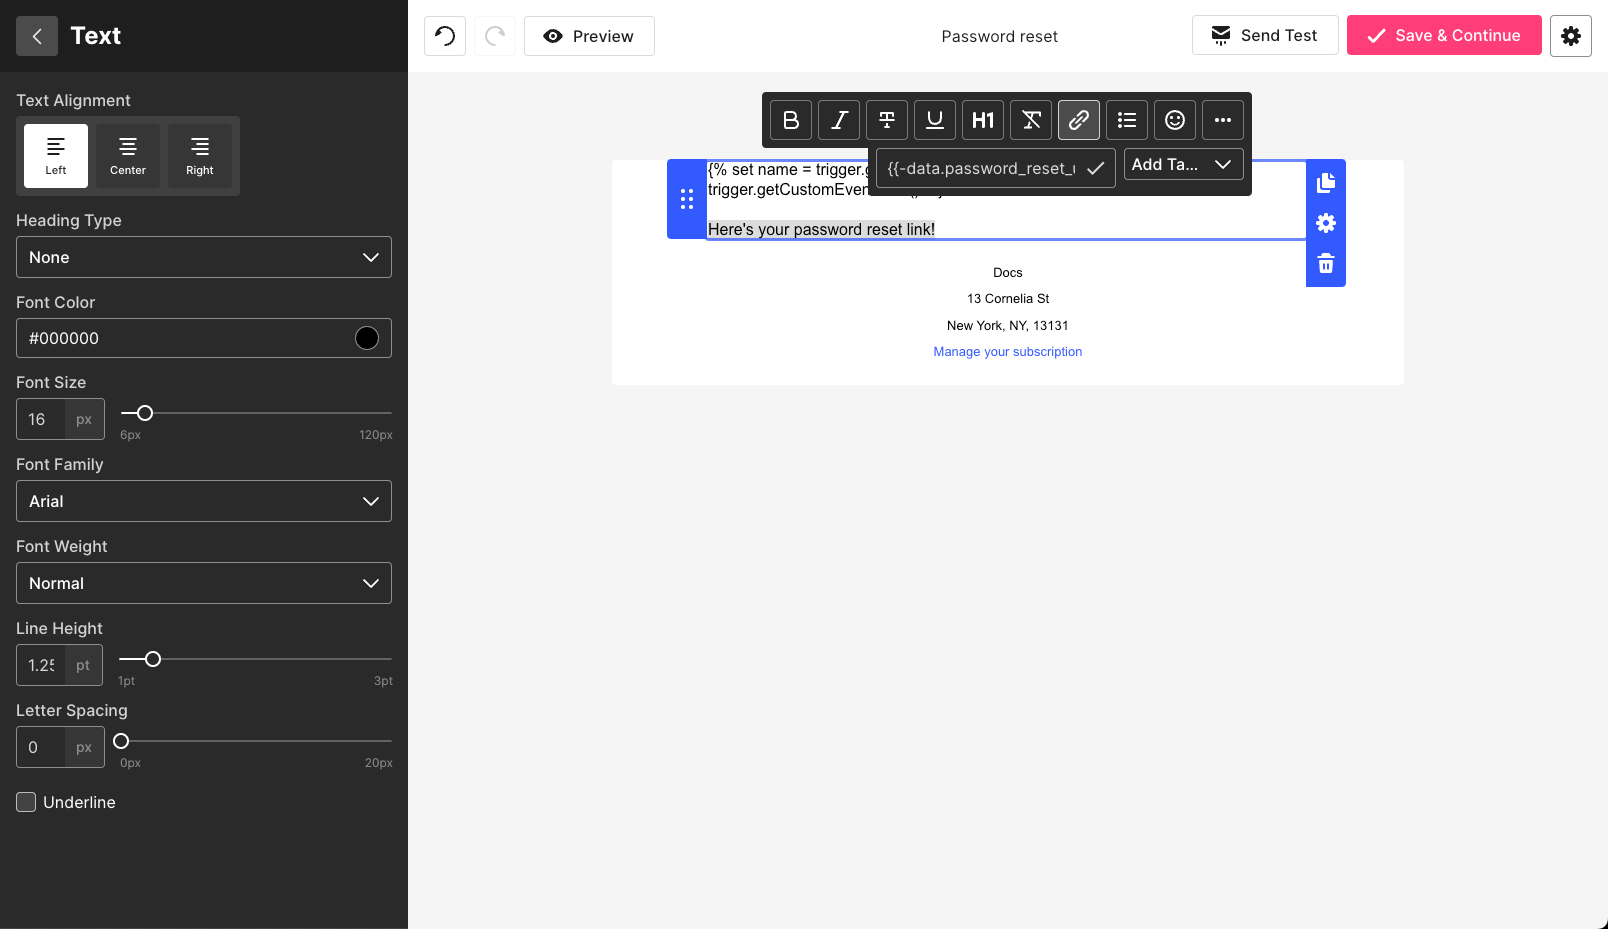
Creating variables allows you to populate data in your email using templating syntax. We’ll need the variable data to access data from the payload, which includes a URL to the password reset page.
To create variables, add a text box element to your email, then copy and paste the following snippets into the text box. The snippets will not be visible to Contacts who receive your email, they are only visible to you inside the Sendlane email builder.
{% set data = trigger.getCustomEventData() %}Once these variables are in place, they can be used to populate data!
In step 2, we made the API call with the following JSON payload
{
   "token": "1234abcd5678edfg",
   "email": "jimmykim@sendlane.com",
   "custom_event": "password-reset",
   "data": {
     "password_reset_url": "https://www.yourwebsite.com/reset/456789745"
   }
}
Now that we’ve set up our data variable, we can access the password_reset_url via templating syntax:
{{-data.password_reset_url-}}Pasting this snippet directly into the email will display a raw password reset link. Use the hyperlink function in the email builder, a button, or a custom HTML block to hyperlink the URL.
In the email below, our {{-data.password_reset_url-}} is made into a hyperlink, and our variable scripts disappear when the email is previewed.